My daughters and I have developed a bit of an obsession with headbands lately. In order to support this habit of ours, I learned how to make the headbands from Jersey fabric, rather than buy them from an area retailer. Then I started thinking...what about using baby onesies to make the headbands? I searched online but could not find a pattern for what I wanted. So I developed my own to share with you.
Total time for this project was about 15 minutes. I bought my onesie from a consignment store, so total cost was $.80.
First, lay out your onesie and cut a straight line from under one armpit, to under the armpit on the opposite side.
Determine how wide you want your headband to be, double that number, and add 1/2 inch for seam allowance. I wanted a 3-inch headband, similar to those sold at our area retailer, so I cut 6.5 inches down from my first cut.
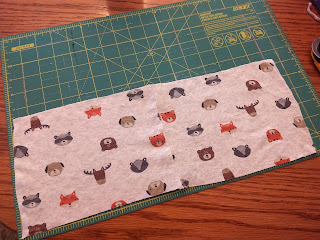
Turn onesie inside out, and cut off one seam.
Once cut and spread open, my 6-month onesie measured approximately 17 inches long, with a seam in the middle. If you want a looser fitting headband, be sure to use a bigger sized onesie. Also, as you will see further down, it is very easy to adjust this headband for a smaller size.
Fold this fabric lengthwise, with right sides together. Make sure your onesie seam lines up in the middle, and using a 1/4-inch seam allowance, sew along the length of the fabric.
I used a ballpoint needle and a zigzag stitch, to allow for stretching.
Turn headband right-sided out. Line up your sewn seam so it is centered on the back side of the headband. Iron seam.
Fold headband in half width-wise, with front sides together. Your rough edges will be lined up.
Flip headband right-sided out. The seam you just created will be neatly tucked inside. This is the back of your headband. This is the point where you can try your headband for fit. If it is too loose, simply repeat the previous step and cut off the extra!
The front of your headband will have a vertical seam directly down the middle.
Using a needle and thread, make a running stitch down the front vertical seam.
Pull your thread tight at the end to cinch the fabric. Repeat, and tie off thread to secure.
That's it! Find yourself a cute little model, and enjoy your handiwork. (Yes, these fit adults as well!)


No comments:
Post a Comment